Alexis Rondeau

Archive

November 2020 · 3 dispatches

dangerzone-writing-plugin

A plugin that forces you to write for X seconds. If you pause for more than 5 seconds, everything you've written in this note is DELETED.

81 stars · 5 forks · TypeScript

🔥 Dangerzone Writing 🔥 for Obsidian

“Elegant”

“Dangerous”

“Relaxing”

“Perverted”

“Your best friend”

“Your worst nightmare”

Hey all, I’ve been a paying customer of FlowState since 2016 and wanted something similar for Obsidian.

It’s really fun. And stressful. But mostly fun.

It’s simple:

  1. You start a timer for X minutes.
  2. THEN, during those X minutes you MUST write continuously.
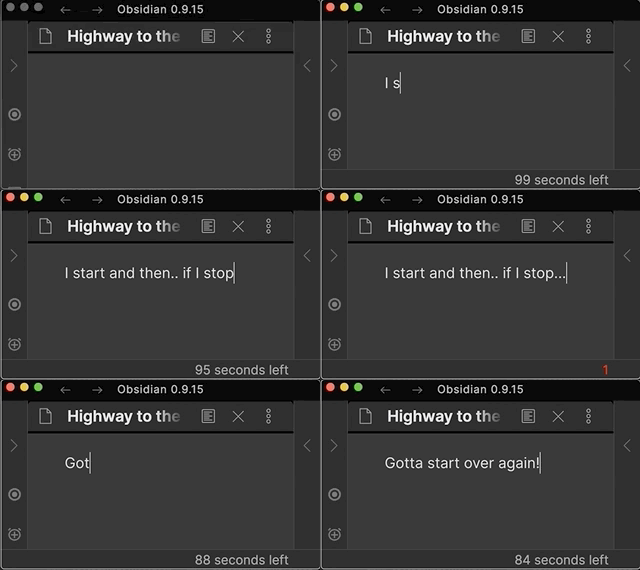
  3. The catch: If you PAUSE for longer than 5 seconds, everything you’ve written is DELETED.

Here’s an example session:
When to use Dangerzone Writing

  • Use it to “warm” up your writing muscle
  • Use it to write that first draft however dirty and ragged
  • Use it to keep you laser-focused on writing

How to use the Dangerzone Writing plugin

  1. Open a note in Obsidian^
  2. Click the “Stopwatch” icon in the left bar to start the timer
  3. From now on, the count-down from 60 seconds to 0 starts
  4. Start writing!
  5. DO. NOT. STOP. WRITING for 60 seconds.
  6. If you DO stop writing for more than 5 seconds, everything you’ve written in this note so far is DELETED.

Again, let me be clear: If you stop for more than 5 seconds, your writing in this note will be deleted.

^ I usually create an empty one, but that’s not necessary

How to start as a beginner

If you’ve never used this type of writing before, I highly recommend starting with the defaults and an empty note to get a feeling for it.

A few simple tips and tricks

  1. Fake it till you make it: It’s totally fine to write a lot of “nothing” such as Well, I don't know what to write here. Nothing comes to mind. I'm sitting here. Writing... - I do this all the time. You’ll eventually find a thought that is interesting, so don’t worry.
  2. Don’t Panic: Just because there’s a countdown, doesn’t mean you have to freak out. I know this sounds weird, but as long as you hit a key every second or so, this thing won’t blow up. So, instead of switching to PANIC-MODE as soon as you start a session, just stay calm and start writing.
  3. Start small: Gradually increase session time as you get more comfortable with this type of challenge.
  4. Learn to touch-type: Learn to touch-type if you’re not yet fully touch-typing and you’re struggling with the mechanics to keep up. This is one of the most powerful hard-skills I’ve ever learned.

How to personalize your sessions and fuse time

To optimize your flow experience, you can configure your:

Writing Session Timing Settings

  • Countdown duration in seconds: Default is 60s, How many seconds you want your Dangerzone Writing session to last?
  • Seconds-to-deletion fuse: Default is 5s, How many seconds until your text is deleted?

Immersive Writing Settings

  • Session Font-Size: Increases editor font-size temporarily for a more immersive experience. Leave empty to keep default size
  • Session Background Color: Changes background color of editor temporarily for a more immersive experience. Find a good color at https://htmlcolorcodes.com. Leave empty to omit

Successful sessions tracking

You get a +1 🎉 for every Dangerzone Writing session you complete successfully. “Successfully” means that once the timer is up, there is at least some text there (indicating you didn’t just give up and let the countdown finish).

Let me know how it goes!

Thank you

Thank you ryanjamurphy, roberthaisfield, macedotavares, afokapu, tristanbailey, lukeleppan, AutonomyGaps and hicsuntdragons for your feedback and support.

Disclaimer

This plugin is provided as-is with NO warranty that it’ll work exactly as you expect. It’s made to DELETE text in a note after X seconds of inactivity when you’re start a session. Please do not hold me responsible if it does, in fact, DELETE your text. That’s what it does. On the other hand there is always the possibility of a bug that makes this plugin behave unexpectedly.
text-expander-plugin

A bare-bones and opinionated proof-of-concept text expander utility for Obsidian

12 stars · 2 forks · TypeScript

Text-expander

A bare-bones proof-of-concept implementation of a simple text-expander in Obsidian.

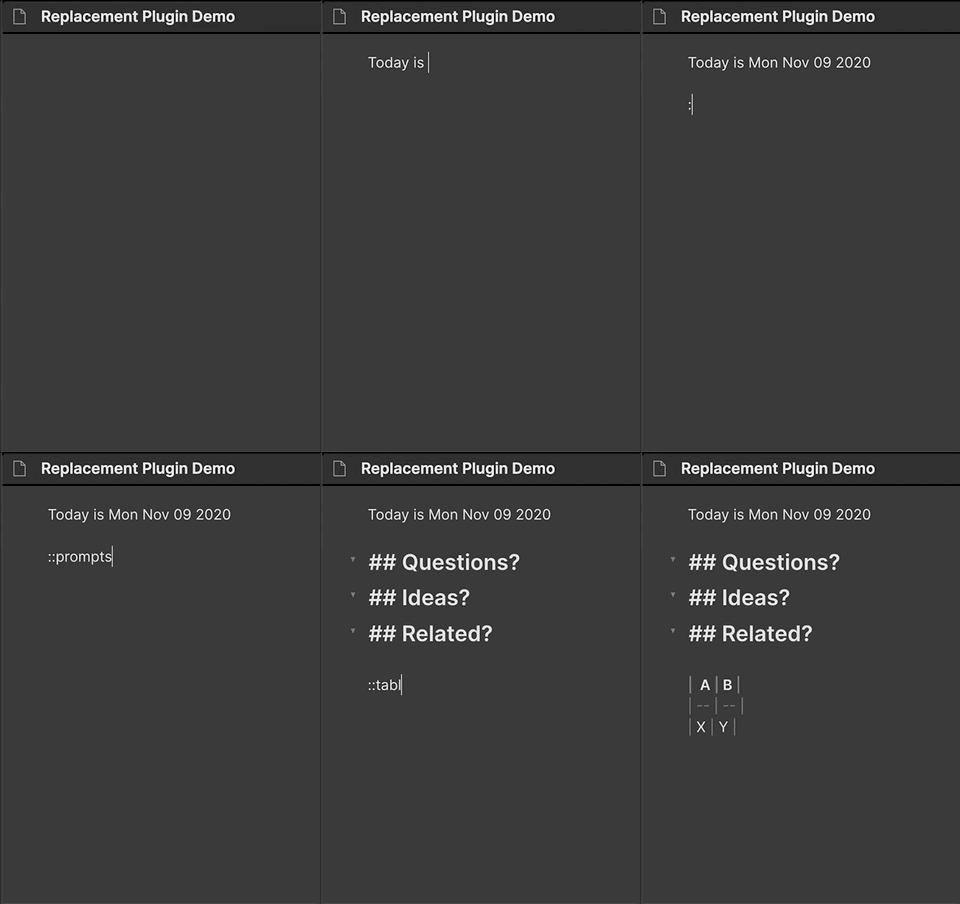
  1. Uses :: (two colons) to start the trigger-sequence
  2. Define your own custom trigger keyword like foo
  3. In the editor, type ::foo + ENTER (or Tab or Space) to expand

Built-in is ::date which will expand to todays date such as Mon Nov 09 2020 and ::time which will expand to your current timezone’s time.

Demo

Demo

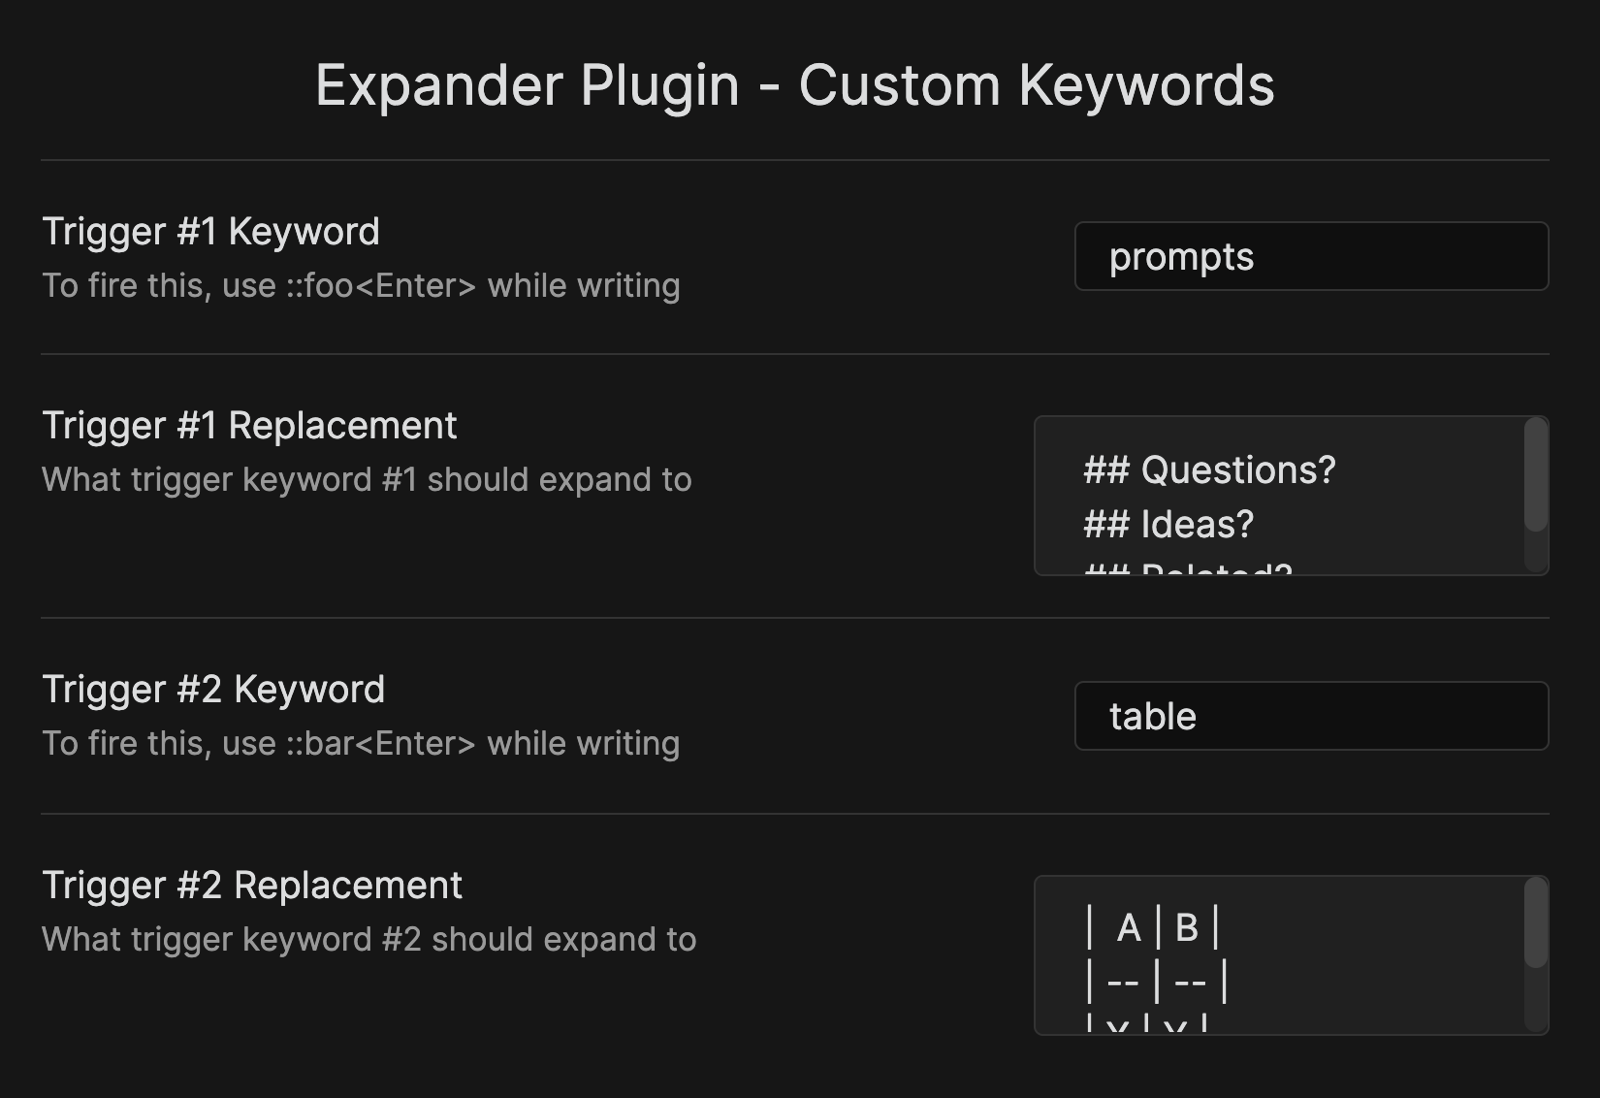
Settings

Settings

Hacking and Help

This is mostly a proof of concept for myself and it’s rather, erm, “pragmatic” code. If you see something you’d like to change, let me know. Here’s how you can fiddle around on your own yourself and send a pull-request

Clone and make new branch

  • cd $VAULT/.obsidian/plugins
  • git clone <https://github.com/akaalias/text-expander-plugin>
  • cd text-expander-plugin
  • git checkout -b my_branch
  • git remote add upstream <https://github.com/akaalias/text-expander-plugin>

Install deps

  • npm i && npm install -g prettier && npm install -g eslint
  • npm run dev

Edit

  • git checkout -b my_branch
  • Make your edits
  • To check your changes, reload Obsidian (Command-R)

Commit-prep

  • ./ship.sh will prettify and elsint once again
  • git add -p to stage changes individually
  • git commit -m "my message"

Publish pull request

  • git push -u origin my_branch

extract-highlights-plugin

Manage your highlights in Obsidian by easily creating, removing and exporting them.

95 stars · 10 forks · TypeScript

Extract Highlights Plugin

Create and extract highlights from a current markdown note in Obsidian into your clipboard. Based on icebear’s plugin request.

Training Videos

Watch: The Quick-Start Tutorial!

Watch: A SECRET NEW highlight mode

Watch: Tips and Tricks for the SECRET mode

How it works

This plugin will copy the highlights delimited by ==, ** and <mark></mark> into your clipboard as a bullet-list.

Optionally you can customize…

  • The heading text of the list, include the note-title or hide it all-together
  • Adding a footnote to each that link back to the source-file
  • Creating an ad-hoc map-of-content (MOC) by turning each highlight into an <span class="wikilink unresolved"> Obsidian link </span>
  • Auto-capitalize the first letter in each highlight for consistency

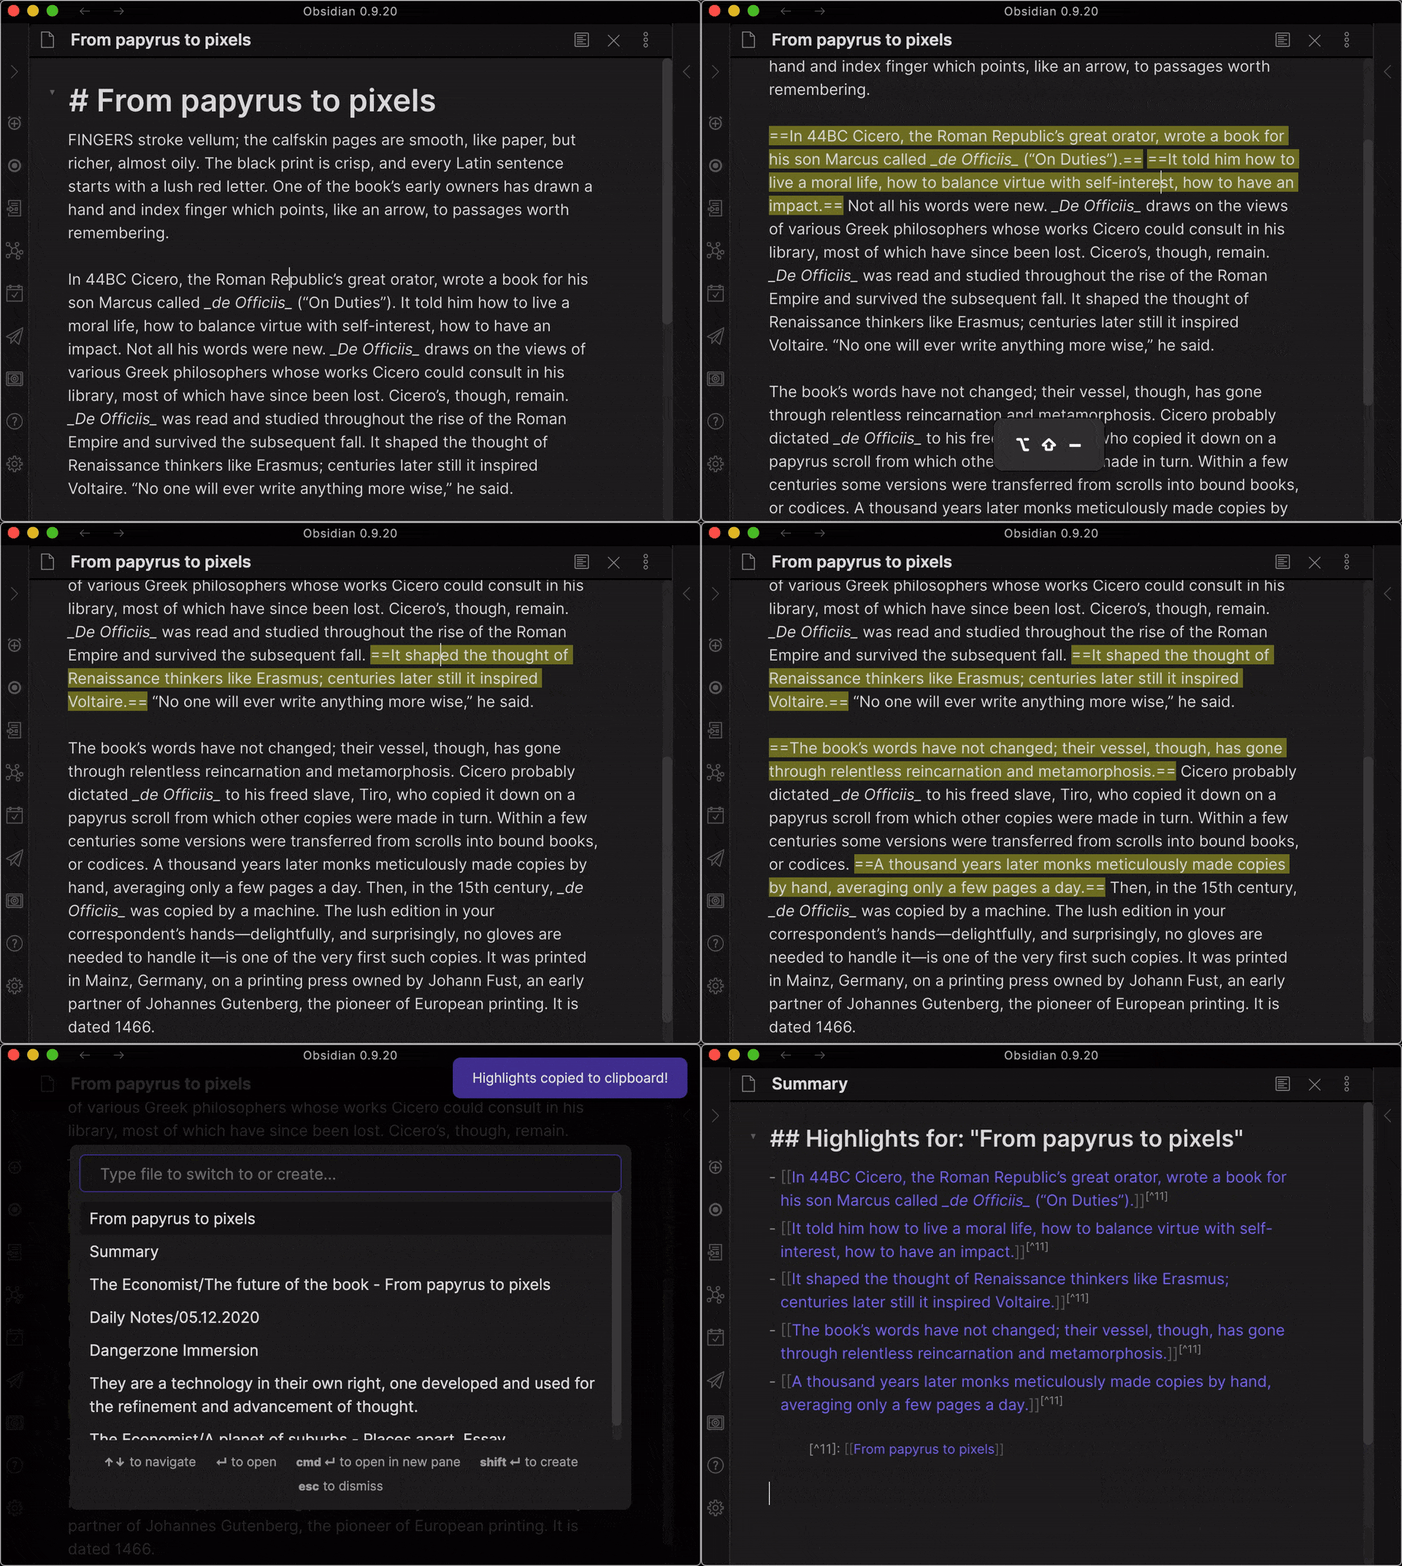
Demo Creating and Extracting Highlights

  1. First you see how I use the CREATE highlights hot-key to highlight sentences
  2. Then you see how I use the EXTRACT highlights hot-key to create a new file with the highlights

basic functionality

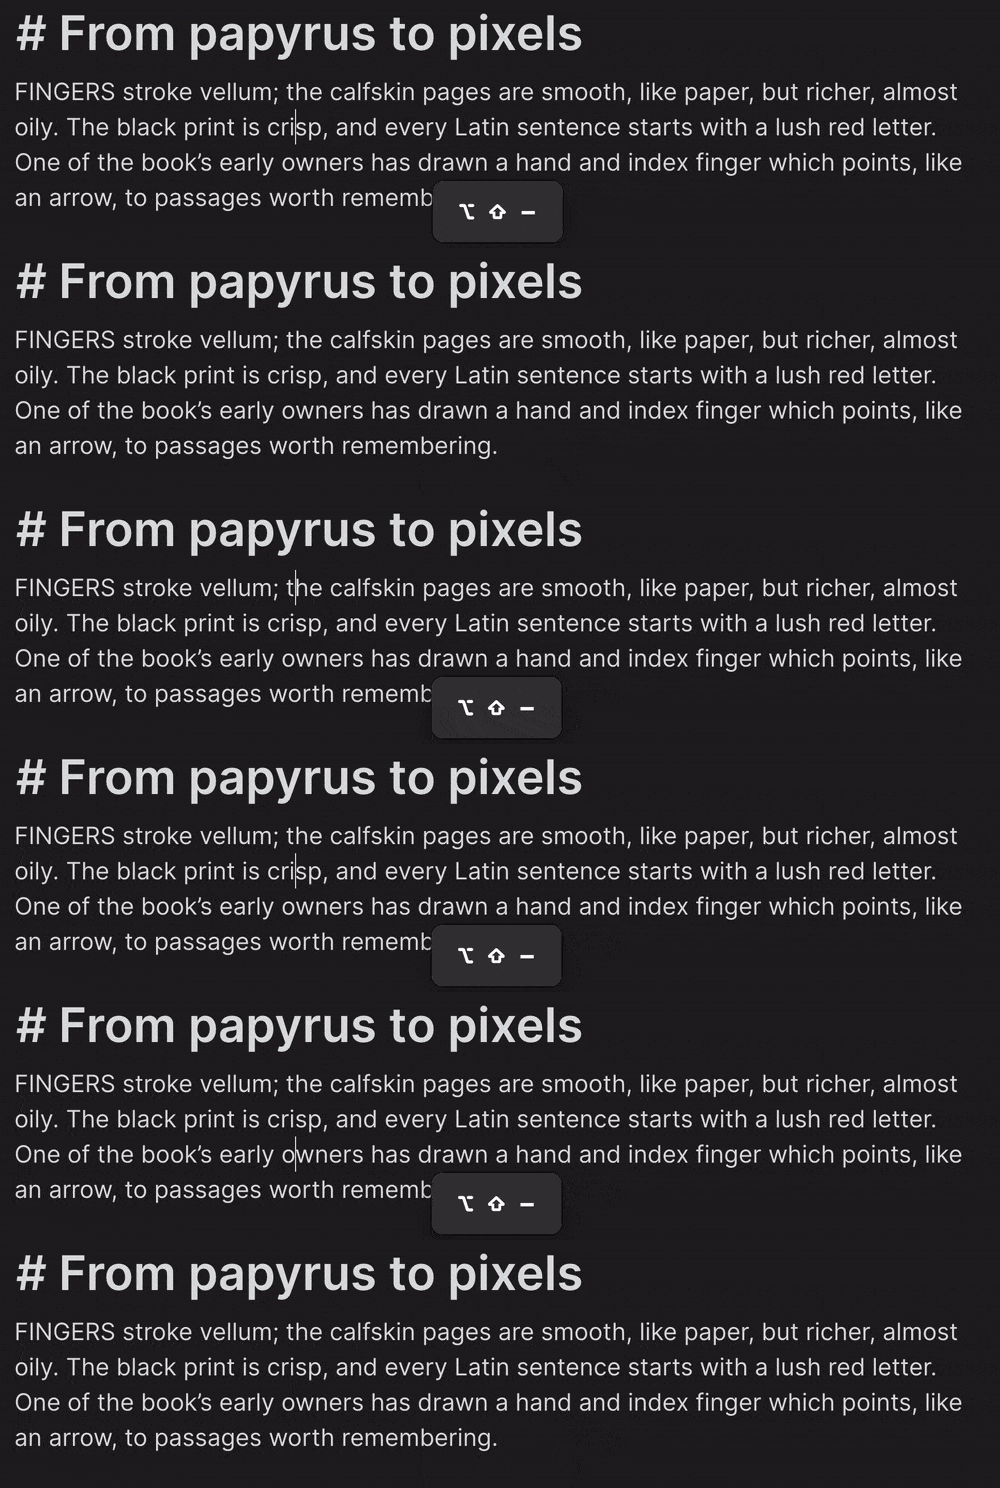
Using the Hotkey to HIGHLIGHT (and UN-HIGHLIGHT) the sentence under cursor

The default hotkey for this is:

SHIFT + ALT + _

Super useful for when you’re reading and just don’t want to switch to your mouse for selecting the sentence.

demo

Will remove highlighting if the sentence under your cursor is currently delimited by “==”.

Using the Hotkey to EXTRACT highlights

The default hotkey is:

SHIFT + ALT + =

Using the Ribbon Button

There is also a button (a circle-shape) that’s added to your left-side ribbon.

Clicking on it will also extract all highlighted parts in your current note and place it in your clipboard.

Using the Command Palette

I looked into it and there’s a bug the way clipboard works with the Command Palette. Basically everything but the “Paste” works.

But I’ve found a temporary work-around. It’s weird but it works.

  1. Trigger Command Palette (Command-P)
  2. Find “Extract Highlights”
  3. Hit Enter (You should see a notification (“Highlights copied to clipboard!”)
  4. Workaround: At this point, briefly switch to a different note and back (This materialises the clipboard data for pasting)
  5. Paste works now the same as with the Hotkey and Button-press

Pasting highlights from your clipboard

After using the hotkey, button or command palette, anywhere you want, just paste the clipboard!

Command + v (MacOS) or the equivalent on Windows/Linux

The output is a markdown-block titled “Highlights” with a bullet-list of the highlights.

Feedback

Are you using Extract Highlights? I’d love to hear from you!

Share your questions and suggestions in the forum

Backlog

TODO

  • Record video on using the “explosion mode” for research and creating atomic notes

    • Pre-requisites

      • Highlights Plugin

        • Create links
        • Create page
        • Enable explode mode
        • Open notes on creation
      • Sliding Panes Plugin
    • Start with a good article (Economist)
    • Go through and highlight sentences
    • Create MOC and explode into notes

      • BOOOMMMMM!!!
      • You’ve got an MOC
      • You’ve got the core for single-idea, atomic notes
      • You’ve got a backlink to the original file

DOING

…

DONE

  • “Explode” highlights into individual notes (assumes I’m creating the list of links as well)
  • command (SHIFT + ALT + =) which then copies all of the highlighted text either into:
  • click a button which then copies all of the highlighted text either into:
  • allow for <mark></mark> to be used as highlights
  • allow for standard bold (**) to be used as highlights
  • allow to optionally include or completely exclude ## Highlights heading
  • allow to change text in heading ## My Custom Highlights
  • allow to include note-name in heading such as ## From: $NOTE_TITLE
  • allow to add footnotes for each highlight and include link to source-note
  • allow to optionally enable bold for highlights
  • allow for Command Palette to trigger copying (Works sort of, bug in Electron)
  • my clipboard
  • a new note